Holiday Ornament Candy Balls

Featured in: Simple Sweet Treats

These festive candy balls capture the joy of the holiday season with their colorful coatings and ornament-like appearance. Made by blending crushed vanilla wafers, nuts, and creamy peanut butter, they are chilled to firm before being dipped in white chocolate and decorated with vibrant sprinkles and glitter. Mini pretzel sticks or licorice strings create charming ornament hooks, making these treats ideal for dessert tables or gifting. Variations include nut-free and gluten-free options, and they store well refrigerated for up to a week.

Updated on Tue, 09 Dec 2025 14:23:00 GMT
Brightly colored, festive Holiday Ornament Candy Balls sprinkled with sparkling sugar, ideal for gifting. Pin this
Brightly colored, festive Holiday Ornament Candy Balls sprinkled with sparkling sugar, ideal for gifting. | terrawhisk.com

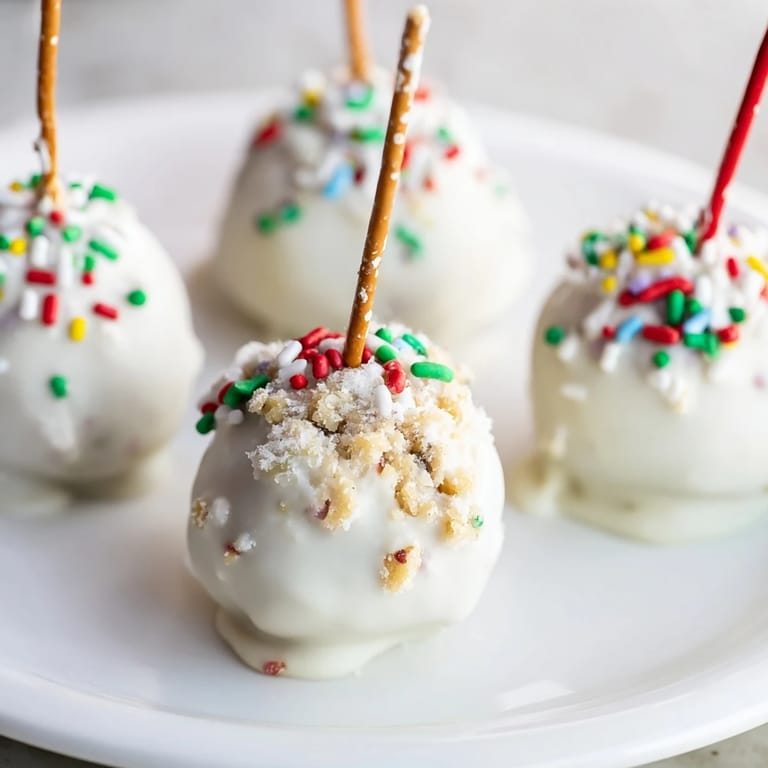
Festive, colorful candy balls that resemble holiday ornaments perfect for gifting or decorating your dessert table.

This recipe has been a holiday favorite in my family for years bringing joy and sweetness to every celebration.

Ingredients

  • Base: 2 cups vanilla wafer cookies, finely crushed, 1 cup powdered sugar, 1 cup finely chopped pecans or walnuts
  • Binding and Flavor: 1/2 cup creamy peanut butter, 1/4 cup unsalted butter, softened, 3 tbsp milk, 1 tsp vanilla extract
  • Coating & Decoration: 1 1/2 cups white chocolate chips or candy melts, assorted holiday sprinkles, colored sugars, or edible glitter, mini pretzel sticks or licorice strings (for ornament hooks)

Instructions

Step 1:
In a large bowl, combine crushed vanilla wafers, powdered sugar, and chopped nuts.
Step 2:
Add peanut butter, softened butter, milk, and vanilla extract. Mix until a thick, cohesive dough forms.
Step 3:
Roll dough into 1-inch balls and place on a parchment-lined tray.
Step 4:
Chill balls in the refrigerator for 15 minutes to firm up.
Step 5:
Meanwhile, melt white chocolate chips or candy melts according to package instructions.
Step 6:
Dip each chilled ball into melted chocolate, allowing excess to drip off.
Step 7:
Place dipped balls back onto the tray and immediately decorate with holiday sprinkles or edible glitter.
Step 8:
Before the coating sets, gently press a mini pretzel stick or small piece of licorice into each ball to create an ornament hook.
Step 9:
Refrigerate until set about 10 minutes. Serve or package for gifting.
Pin this
| terrawhisk.com

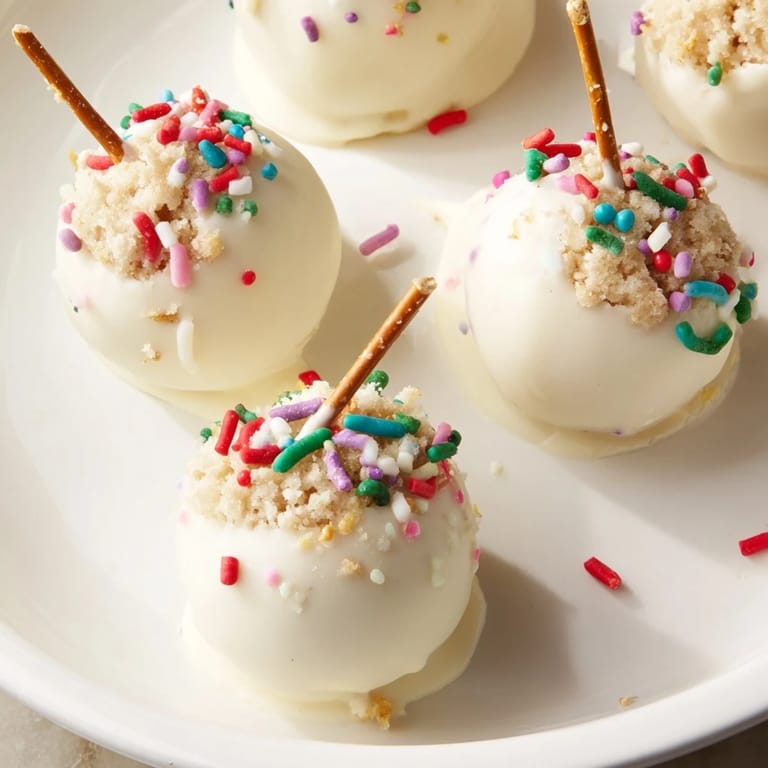
Making these candy balls always brings my family together, sharing laughter and sweet memories during the holidays.

Required Tools

Mixing bowl, spoon or spatula, measuring cups and spoons, baking tray, parchment paper, microwave-safe bowl (for melting chocolate)

Allergen Information

Contains peanuts or tree nuts (depending on nut choice), milk, gluten unless using gluten-free wafers. May contain soy in chocolate. Always check ingredient labels for potential allergens.

Nutritional Information

Calories 140, Total Fat 7 g, Carbohydrates 17 g, Protein 2 g per serving.

A close-up of glossy Holiday Ornament Candy Balls, ready to eat, with tiny pretzel "hooks" and sprinkles. Pin this
A close-up of glossy Holiday Ornament Candy Balls, ready to eat, with tiny pretzel "hooks" and sprinkles. | terrawhisk.com

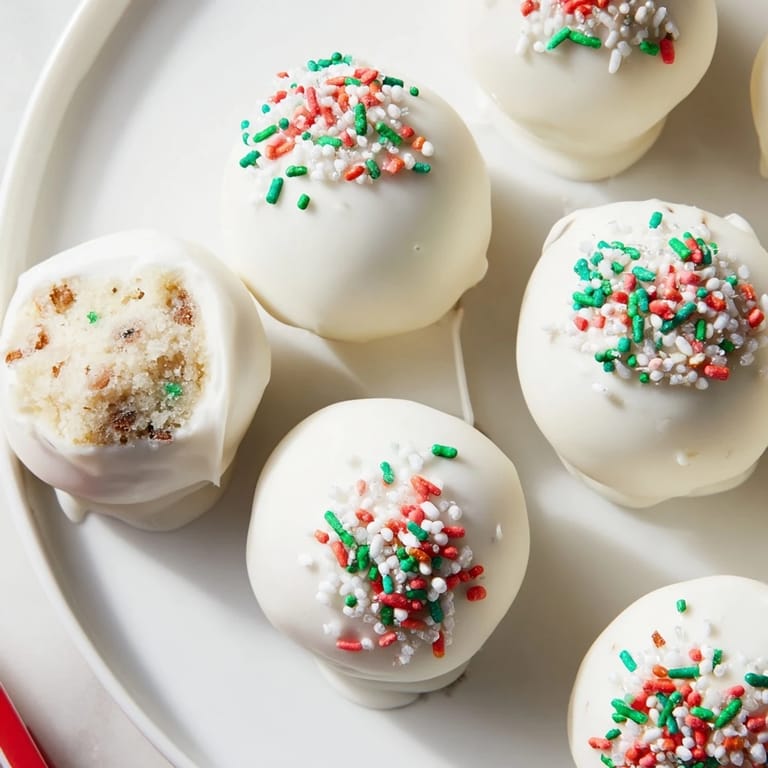
These holiday ornament candy balls are sure to brighten any celebration with their festive look and delicious flavor.

Recipe FAQs

What nuts can I substitute in this treat?

You can replace pecans or walnuts with almond butter or sunflower seed butter for a nut-free option, adjusting to taste and texture.

Can I use different coatings besides white chocolate?

Yes, dark or milk chocolate melts work well as alternatives, offering varied flavor profiles and colors.

How long should the candy balls chill before dipping?

Chill the formed balls in the refrigerator for about 15 minutes to firm up, which helps the coating adhere smoothly.

Is it possible to make these gluten-free?

Substitute the vanilla wafer cookies with gluten-free versions to accommodate gluten sensitivities without sacrificing texture.

How should these candy balls be stored?

Store them in an airtight container in the refrigerator, where they remain fresh for up to one week.

Holiday Ornament Candy Balls

Festive candy balls with white chocolate coating and holiday sprinkles, perfect for celebrations and gifting.

Time to prep
25 min
0
Overall time
25 min
Created by Naomi Carter


Skill level Easy

Cuisine American

Makes 24 Portions

Dietary notes Vegetarian-friendly

What you need

Base

01 2 cups vanilla wafer cookies, finely crushed
02 1 cup powdered sugar
03 1 cup finely chopped pecans or walnuts

Binding and Flavor

01 1/2 cup creamy peanut butter
02 1/4 cup unsalted butter, softened
03 3 tablespoons milk
04 1 teaspoon vanilla extract

Coating & Decoration

01 1 1/2 cups white chocolate chips or candy melts
02 Assorted holiday sprinkles, colored sugars, or edible glitter
03 Mini pretzel sticks or licorice strings for ornament hooks

Directions

Step 01

Combine dry ingredients: In a large bowl, mix the finely crushed vanilla wafers, powdered sugar, and chopped nuts until evenly blended.

Step 02

Incorporate wet ingredients: Add creamy peanut butter, softened butter, milk, and vanilla extract to the dry mixture. Stir until a thick, cohesive dough forms.

Step 03

Form balls: Roll the dough into 1-inch spheres and arrange them on a tray lined with parchment paper.

Step 04

Chill dough balls: Place the dough balls in the refrigerator for 15 minutes to firm up.

Step 05

Melt coating: Meanwhile, melt white chocolate chips or candy melts according to package instructions.

Step 06

Dip balls in coating: Dip each chilled ball into the melted chocolate, letting excess drip off before placing back on the parchment-lined tray.

Step 07

Decorate candies: Immediately sprinkle holiday sprinkles or edible glitter onto the dipped balls before the coating sets.

Step 08

Attach ornament hooks: Gently press a mini pretzel stick or a small piece of licorice into each ball to create an ornament hook.

Step 09

Set coating: Refrigerate the decorated balls for about 10 minutes until the coating fully sets. Serve or package as desired.

Tools needed

  • Mixing bowl
  • Spoon or spatula
  • Measuring cups and spoons
  • Baking tray
  • Parchment paper
  • Microwave-safe bowl for melting chocolate

Allergens

Review ingredients for allergies and speak with your healthcare provider if you're unsure.
  • Contains peanuts or tree nuts, milk, and gluten unless gluten-free wafers are used
  • May contain soy from chocolate ingredients

Nutrition details (each serving)

This info is a reference and doesn’t replace advice from your doctor.
  • Energy: 140
  • Lipids: 7 g
  • Carbohydrates: 17 g
  • Proteins: 2 g