 Pin this
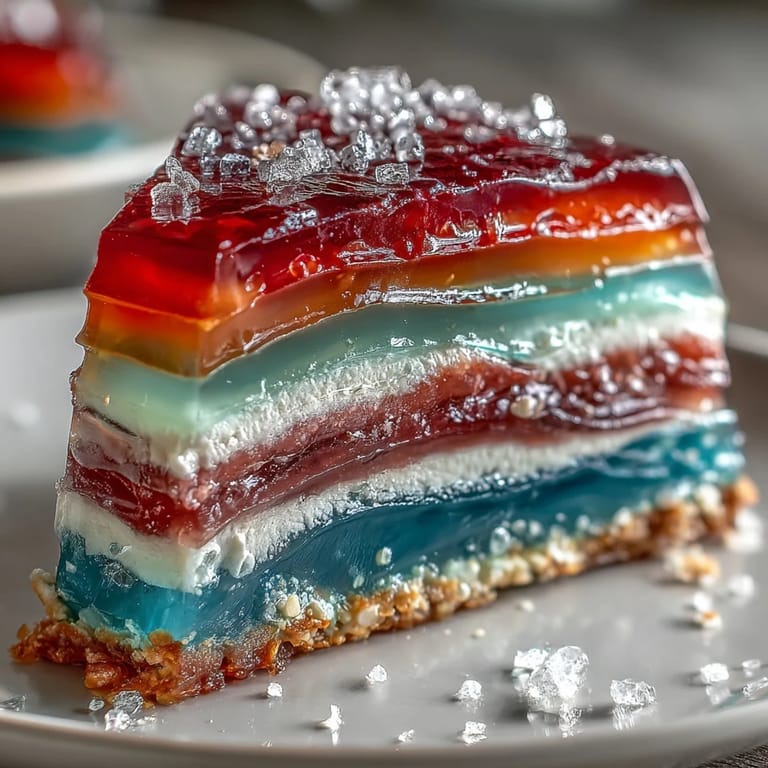
 Standing at my kitchen counter one summer afternoon, the air heavy with tropical humidity, the thought of a cool, breezy dessert led me to experiment with agar-agar for the first time. The packets of food coloring lined up like eager artists' paints, and every swirl of the whisk sent sweet vanilla clouds into the sunlight. Making this Rainbow Jelly Cake wasn't about tradition or nostalgia—it was the promise of slicing into a chilled, jewel-toned slab that could brighten even the stickiest day. Somewhere between boiling and layering, I accidentally splattered blue dye on my sleeve, but it felt somehow perfectly appropriate for a dessert as playful as this. Whenever I see those vibrant layers, I'm reminded that a little mess in the kitchen is a small price for magic.
The first time I made this for a backyard potluck, my neighbor's daughter watched each new colored layer set with growing excitement, clapping every time another stripe appeared. There was something quietly satisfying about the waiting—measuring minutes with conversation and laughter in between pours. By the time I unmolded the cake, the kids had gathered around like I'd revealed a hidden treasure. Their delighted cheers confirmed what I already suspected: this cake is pure joy in edible form.
Ingredients
- Agar-agar powder: This plant-based gelling agent gives the jelly its signature texture; I learned to dissolve it fully for the smoothest layers.
- Water: The backbone for both jelly and coconut layers; filtered water keeps the colors clear and the flavor fresh.
- Granulated sugar: Balances any subtle bitterness from the agar-agar and allows each hue to shine with just the right sweetness.
- Food colorings: Use a light hand and go vivid—it’s easy to go from subtle pastels to electric rainbow, and natural options work too.
- Vanilla extract: Optional, but a splash adds an inviting bakery note to the jelly.
- Coconut cream: The creamy finale, lending tropical richness; get a good quality, thick coconut cream for best results.
- Salt: Just a small pinch sharpens the coconut and keeps it from tasting flat.
Tired of Takeout? 🥡
Get 10 meals you can make faster than delivery arrives. Seriously.
One email. No spam. Unsubscribe anytime.
Instructions
- Create the Jelly Base:
- Stir agar-agar powder into water in a saucepan, then bring to a gentle boil while whisking so it dissolves fully and turns translucent.
- Sweeten and Scent:
- Add sugar and vanilla, stirring until you can no longer feel any granules at the bottom of the pan.
- Dye and Divide:
- Split the hot mixture equally among six bowls, then tint each one with its own vibrant color, swirling gently to avoid bubbles.
- Layer and Set:
- Pour the first colored jelly into your mold and let it just set to the touch before adding the next; the anticipation builds with each new layer.
- Make Coconut Cream Layer:
- In a clean pot, gently heat coconut cream, water, and agar-agar mixture until smooth, then sweeten with sugar and round out with a bit of salt.
- Finish the Cake:
- Once the rainbow is complete and set, carefully pour the warm coconut cream over it—watch for the way it shimmers over the layers.
- Chill Completely:
- Let the whole cake cool, then slide it into the fridge to firm up until your finger bounces gently off the surface.
- Unmold and Serve:
- Loosen the edges with a wet knife or spatula and flip onto a plate; slice into wedges or cubes and serve fridge-cold for the dreamiest texture.
 Pin this
 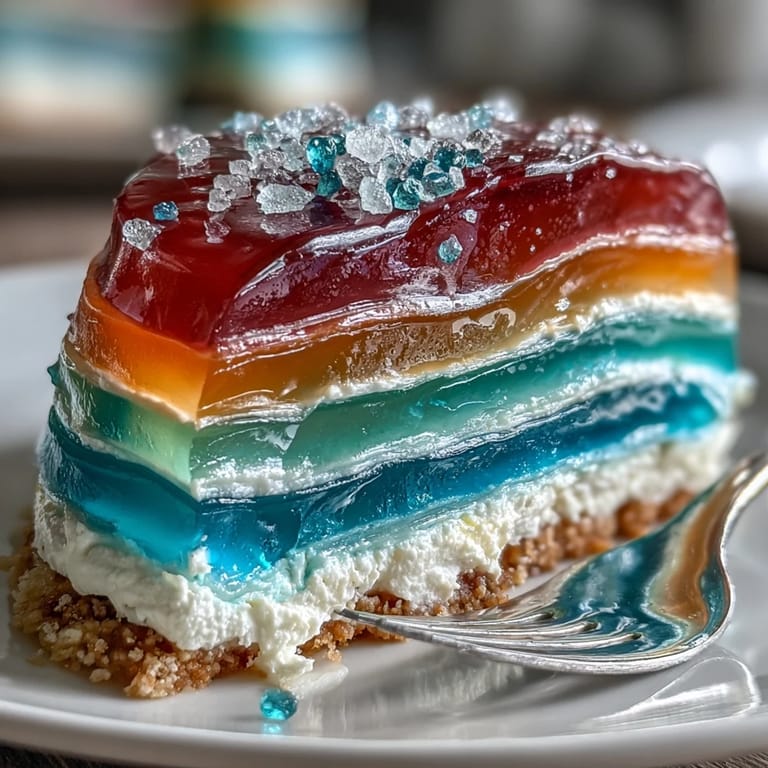 Pin this
 Watching the faces at my table light up as the first glistening rainbow slice was served, I realized this cake does more than cool you off on a hot day—it turns dessert into a shared celebration. Somehow, everyone leans in for a look before they ever take a bite.
Best Ways to Layer Colors
I've discovered that pouring the jelly from just a couple inches above the mold keeps bubbles at bay and prevents the new layer from disturbing the one beneath. If your kitchen is warm, work quickly but stay patient—every minute counts for that seamless rainbow effect.
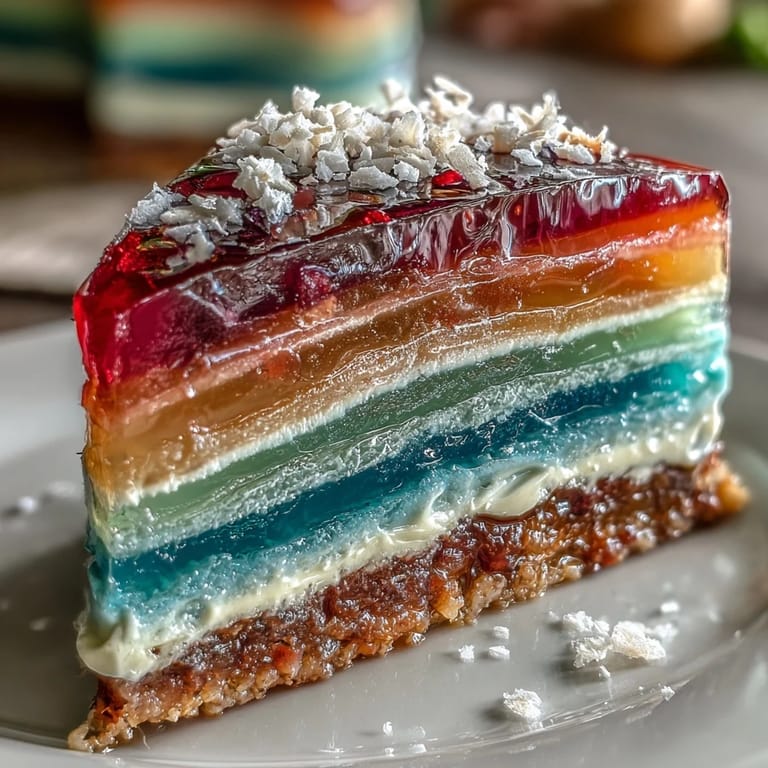
Using Natural Colors and Flavors
Experimenting with natural colors like beet for red or matcha for green resulted in softer, earthy shades that still looked dreamy layered between creamy coconut. A whisper of pandan or rose added subtle perfume without overwhelming the clean, bright coconut flavor beneath.
Make-Ahead and Serving Ideas
Rainbow Jelly Cake is at its very best after a long chill, so I often prepare it the evening before a gathering and unmold it right before serving to preserve the glossy finish. Leftovers make cheerful next-day treats, and a quick drizzle of fresh tropical fruit puree gives every slice extra color.
- Try small individual molds for party-ready minis.
- Use a hot, wet knife for the cleanest slices.
- Don’t rush the chilling—firm jelly is key for the perfect reveal.
 Pin this
  Pin this
 Chill the cake, take a breath, and watch the colors brighten your table—it’s almost too pretty to slice, but sharing is half the fun.
Recipe FAQs
- → How do I prevent the colors from bleeding between layers?
Let each colored layer partially set until it is just firm to the touch but still warm beneath the surface. Pour subsequent layers gently and avoid adding very hot mixtures on top of fragile layers; brief cooling between pours helps maintain crisp separations.
- → Can I use powdered gelatin instead of agar-agar?
Gelatin sets differently and is animal-derived; if you substitute, reduce the liquid and follow gelatin bloom instructions. Texture and chilling time will change, so expect softer, less springy layers compared with agar-agar.
- → How can I add subtle flavor without affecting color?
Use light extracts such as pandan, vanilla, or rose in small amounts; floral or citrus zests can be infused into the clear base before coloring. Add concentrated flavors sparingly to avoid altering hue or setting behavior.
- → What’s the best way to get even, neat layers?
Measure equal volumes for each layer and pour with a ladle at the same spot to spread evenly. Allow each layer to set to a thin skin before adding the next and chill briefly to firm edges for clean lines when sliced.
- → How should I store the finished cake?
Cover and refrigerate for up to three days. Keep it chilled until serving to maintain a firm texture; bring to serving temperature briefly if you prefer a slightly softer mouthfeel.
- → Any tips for making the coconut layer silky?
Warm the coconut cream mixture gently and stir constantly until fully dissolved. Strain before pouring to remove any solids and pour while still warm but not boiling for a smooth, even finish.